The board is hot, breakers smell, and I feel worried; this pain sits until I act and seek a fix.
An overheating distribution board1 usually points to design gaps, loose terminations, thin copper paths, or unmanaged modifications. Checking load diversity, tightening connections, and reviewing the thermal design will stop damage before it grows.

I learned to pause here. If I skip the basics, I risk chasing the wrong problem. Let me unpack each cause, share what I saw in real panels, and give steps that worked for me. Stay with me; the fixes are within reach.
Distribution Board Running Hot? 7 Hidden Thermal Problems?
Heat builds fast and silent; panic rises when I touch a hot cover and do not know why.
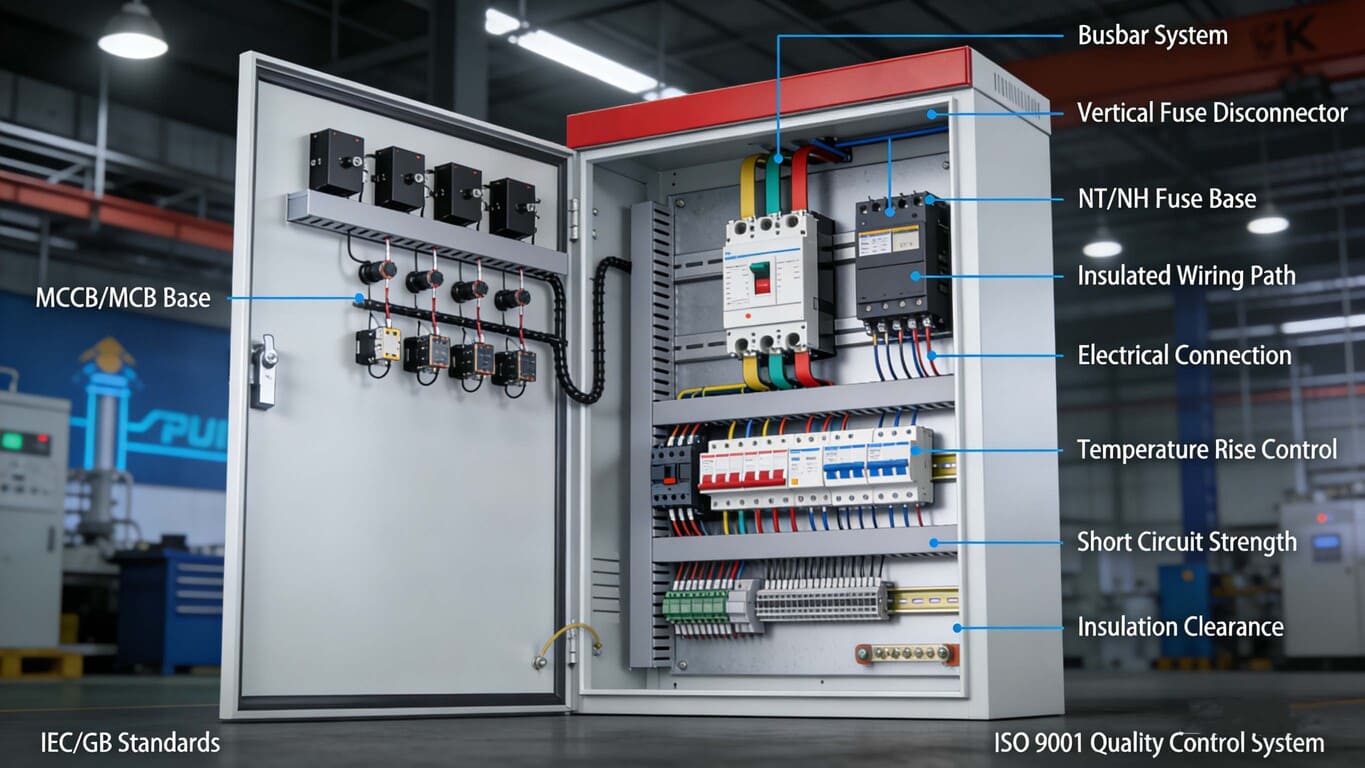
A hot board often hides loose lugs, undersized busbars2, poor airflow, mismatched breakers3, dirt, UV exposure, and ad-hoc add-ons. I check each, one by one, to stop the rise.

When I worked on a mall project, the cover felt warm. The load was within nameplate, yet heat rose. I traced it to loose terminations and thin copper links. I also saw dust clog vents. Below is how I map hidden issues.
| Hidden issue | How I spot it | My quick action |
|---|---|---|
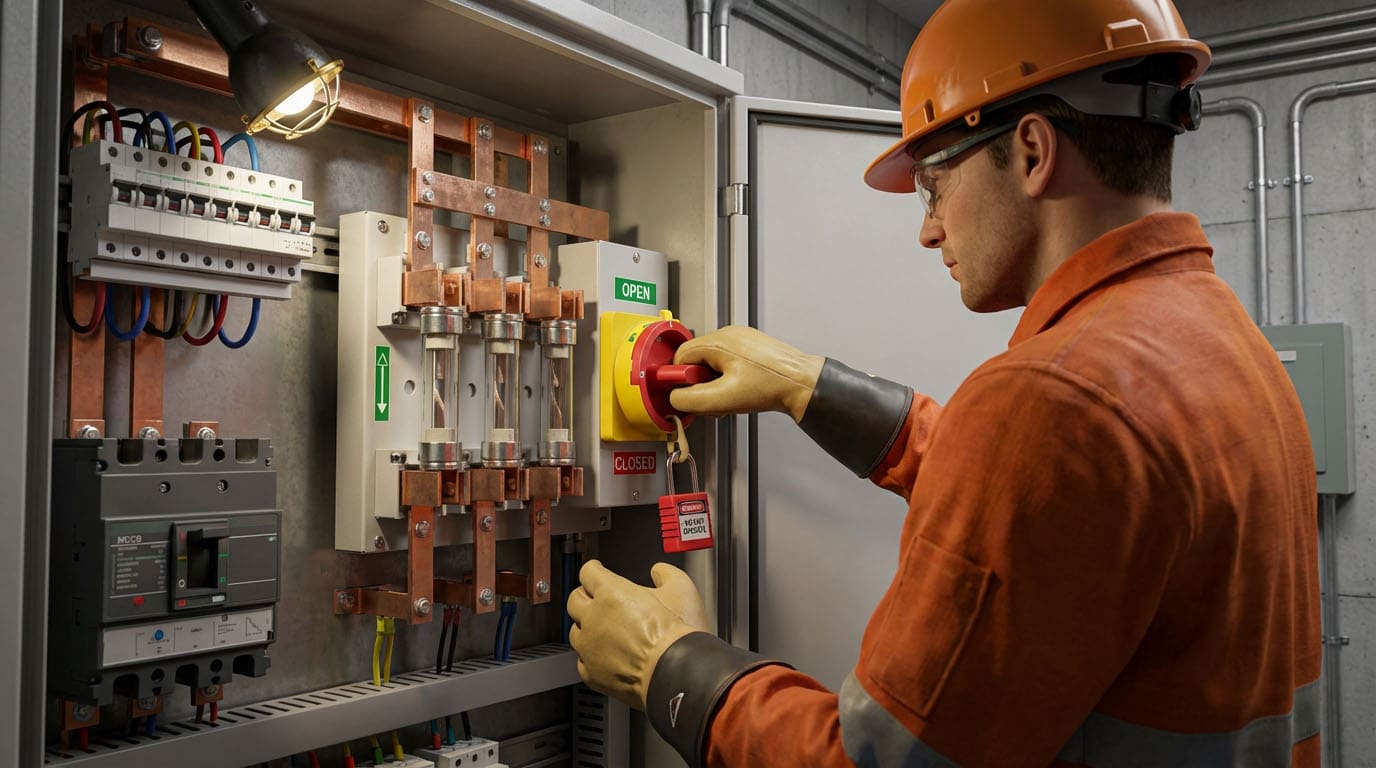
| Loose terminations | Infrared scan, burn marks | Re-torque, clean lugs |
| Undersized busbars | Check cross-section vs load | Upgrade to thicker copper |
| Poor airflow | Blocked vents, high ambient | Clear paths, add spacing |
| Mismatched breakers | Wrong curves, old devices | Replace with matched curves |
| Dirt and corrosion | Dust, rust on metal | Clean, apply anti-corrosion |
| UV exposure | Discolored plastic, brittle | Shield from sun, replace parts |
| Ad-hoc add-ons | Extra wires, no records | Remove or re-route, update docs |
I start with thermal imaging. I then use a torque wrench to verify terminations. If busbars look thin for the load, I model the current density and compare with standards. I once caught a panel that had extra lighting circuits added without records; removing that clutter dropped the temperature by 8°C. Small airflow tweaks like spacing and clearing cable bunches help. The key is to tie every change to a simple log so future me knows what changed.
What Causes Breaker Nuisance Tripping in Distribution Boards?
Trips that seem random make me doubt the system and my design choices.
Nuisance tripping often comes from heat-soaked breakers, wrong trip curves, shared neutrals, or unbalanced phases. I match curves to loads, re-balance phases, and cool the panel to stop false trips.

Breaking down nuisance trips
On a factory line, breakers tripped during peak sun. The ambient inside the panel was 50°C. The breakers derated and tripped early. I learned to factor heat and curve type. Here is my check.
| Cause | Field sign | What I do |
|---|---|---|
| Thermal derating | High internal temperature | Improve cooling, re-rate load |
| Wrong trip curve | Trips on motor start | Swap to motor curve breaker |
| Shared neutral issues | Neutral overheating | Separate circuits, size neutral |
| Phase imbalance | One phase hotter | Re-distribute single-phase loads |
| Aging breakers | Trip below rated current | Replace and retest |
| Harmonics | Hot neutral, buzz | Add filters, use true RMS gear |
I measure internal temperature and apply manufacturer derating charts. I check if motors are on a B curve instead of a D curve. I learned to place single-phase loads across phases to balance current. When the neutral ran hot, I saw harmonic distortion from drives; adding filters and a larger neutral eased heat and stopped trips. I never just upsize a breaker. I fix the root heat and matching issue.
Temperature Rise in Distribution Boards: How to Fix It?
A steady climb in temperature warns me before smoke ever does.
To fix temperature rise, I check load diversity, tighten terminations, increase copper thickness, and clean airflow paths. I model thermal paths early and log every change to keep control.

Breaking down fixes for temperature rise
In one office tower, the board warmed up over months. The total load did not change much, but small tenant add-ons did. I found thin copper links. After upgrading and cleaning terminations, temperature dropped. My steps are below.
| Fix step | Why it matters | How I apply it |
|---|---|---|
| Check diversity factor | Avoid overestimating demand | Use measured load, not guess |
| Tighten terminations | Reduce contact resistance | Torque per spec, mark checked |
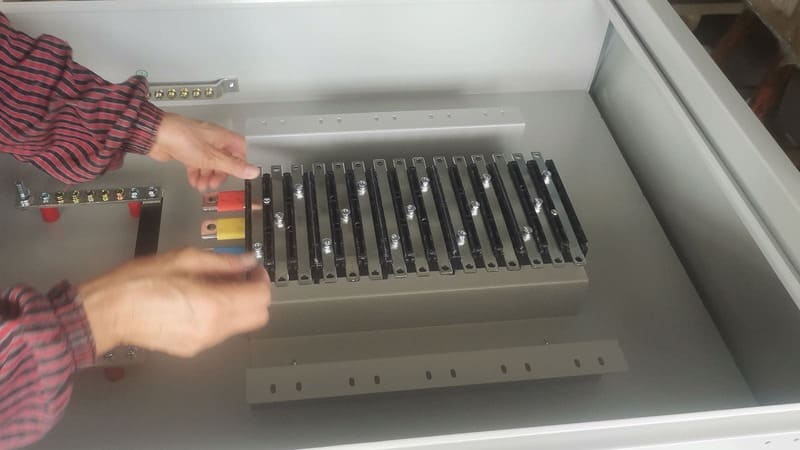
| Thicken copper paths | Lower current density | Replace links, busbars |
| Improve layout | Reduce hotspot clustering | Space breakers, reroute cables |
| Clean and seal | Better convection, less loss | Remove dust, seal gaps |
| Monitor continuously | Catch drift early | Add sensors, log data |
| Control changes | Keep design stable | Approve and record every mod |
I start with a simple current log to verify diversity. I then open the panel, torque every lug, and check for discoloration. If copper bars look slim, I replace them with thicker bars; I saw a 12°C drop once from that alone. I keep breakers spaced to let air move. Dust acts like a blanket; I wipe and seal to stop new dust. I now add temperature sensors to key points. Every time someone wants to add a circuit, I use a change form. This keeps design drift away and keeps heat in check.
How to Reduce Heat in Electrical Panels?
Heat steals life from every component and makes me pay later.
I reduce heat by designing with thicker busbars, allowing airflow, balancing phases, and avoiding ad-hoc wiring. I also plan thermal paths in software before metal is cut.

Breaking down heat reduction steps
When I worked on a solar combiner box, ambient was high. I had to design for heat from day one. I modeled the panel in 3D, checked thermal paths, and chose busbars with enough cross-section. Here is my approach.
| Step | Effect on heat | My action |
|---|---|---|
| Thermal modeling early | Predict hotspots | Use software to map heat flows |
| Busbar sizing | Lower I²R losses | Oversize copper within budget |
| Phase balancing | Equal heat spread | Distribute loads evenly |
| Venting and spacing | Better convection | Provide gaps, add louvers |
| Clean terminations | Less contact heat | Regular torque and clean checks |
| Avoid ad-hoc changes | Stable thermal profile | Enforce change control |
| Continuous monitoring | Early warning | Install temp sensors and alarms |
I model heat with simple tools and match it with real thermography after build. I pick copper sizes based on current density targets, not just cost. I balance phases so no single bar runs hotter. I leave space around breakers and add louvers if ambient is still high. I keep a strict rule: no one changes wiring without a record. When I added IoT temperature nodes, I caught a rising hotspot near a neutral link and fixed it before it became a fault. This blend of design, discipline, and monitoring keeps panels cool.
Conclusion
Overheating panels trace back to design, connections, and change control; I fix heat by sizing right, tightening well, modeling early, and watching temperature always.
-
Understanding the causes can help you prevent overheating and ensure safety in your electrical system. ↩
-
Discovering the implications of undersized busbars can prevent overheating and improve system reliability. ↩
-
Exploring the impact of mismatched breakers can help you optimize your circuit protection strategies. ↩